Fourth Layer Strategy Guide
The Burning Wasteland lies deep in the fourth layer of the
Abyss, a charred vestige of the old kingdom entombed under ash
and lava. Hordes of fire- and earth-type monsters on the prowl
everywhere, so a weapon with an Icestone or Boltstone will
definitely come in handy. While this layer has roughly the
same number of floors as the third layer, here you will
encounter new time-based mechanics and a powerful mid-boss at
its core. The floors themselves are larger and more complex,
with signal fires few and far between, which means exploring
it will take some time. This page covers everything you need
to know to conquer the fourth layer of the Abyss, including
what monsters and obstacles await you.
- Total Floors:
- 18
- Recommended Level:
- 30
- Signal Fires Floors:
- 1, 7, 12, 16
General Mechanics
Lava-Spewing Craters
Lava plumes will surge from craters at regular intervals,
dealing tons of damage to any hero or monster caught in the
swell. You'll see glowing embers in the crater right before
it blows, so stay clear to avoid burns. Leading a group of
monsters into a crater as it erupts serves as an effective
form of crowd control. Throughout the fourth layer, you'll
often find yourself trapped between a rock and a hard place,
or rather between a monster and a crater. Try provoking
monsters with light attacks and luring them toward a crater
to give yourself an advantage in battle.
Hidden Runes
Each layer contains a special object that reflects the
atmosphere of that floor. Attack this object to earn lots of
runes. In the fourth layer, keep an eye out for something
shining in the lava flows.
Notable Monsters
 Will-o-the-Weasels
These monsters are more powerful than the Wicked Weasels in
the second layer and can deal fire damage with their rapid
ranged attacks. You'll usually find them hanging around
larger monsters, letting the big guys keep their prey
occupied while they deal damage from a distance. Although
they have a lot of HP, you can take care of them quickly by
exploiting their weakness with ice attacks.
 Fire Fiends & Earth Fiends
Fiends tend to stick close to other monsters and use magic
to strengthen their allies. The red Fire Fiends can boost
other monsters' attack power, while the purple Earth Fiends
bolster their defenses. Since they can't actually attack
anything on their own, they'll cower and flee if no other
monsters are around. This puts them lower on your priority
list compared to the rest of the horde. Fire Fiends are
particularly weak against blunt and ice damage, while Earth
Fiends will fall easily to blunt and lightning damage.
 Light Turrettle
You'll encounter turtle-type enemies for the first time on
the fourth layer. Their attacks can inflict confusion, and
you may find the lateral trajectory difficult to avoid.
Their huge size and HP pool will cause you problems in more
ways than one. When facing a single Light Turrettle, wait
until it finishes attacking before closing in and using your
own high-powered skills. Blunt damage will break through its
shell. If you find one grouped up with other monsters, take
out weaker foes first while avoiding its cannonballs.
Notable Floors
Floor 11: Fiend Lord (Mid-Boss)
The Fiend Lord mid-boss of the fourth layer uses magic to
summon and strengthen monsters that serve as its underlings.
It has four action patterns: summoning monsters, boosting
their attack and defense, warping across the stage, and
swiping at you with its spear. Since it has fairly low
attack power, take out the monster minions quickly so you
can focus on the Fiend Lord instead. The monster summons
won't drop any items or EXP upon defeat. But if you just
ignore them, you may find yourself quickly surrounded by
four at once. The Fiend Lord is weak against blunt damage
and ice attacks, so equip the Warrior or Fighter with an
Icestone to put an end to its tricks once and for all.
Floor 15: Monster Mash
On Floor 15, you'll face three monster swarms:
● 3 Sandy Hatters, 9 Dirtbats
● 4 Dune Crabs, 2 Earth Fiends
● 2 Flame Turrettles, 2 Light Turrettles, 1 Earth Fiend, 1 Fire Fiend
Unless you're quick on your feet, you'll struggle to deal with the hordes of smaller enemies or escape tight spaces packed with larger foes. Use your skills to reduce their numbers as fast as possible. The last swarm is full of monsters with powerful ranged attacks. Take out each Turrettle quickly to give yourself the best chance of survival.
Legendary Equipment
-

Wanderer Gear:
- Wild Sword
- Attack: 116〜124
-

Warrior Gear:
- Windcutter Tachi
- Attack: 126〜134
-

Rogue Gear:
- Sin Speakers
- Attack: 107〜115
-
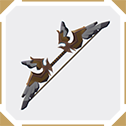
Archer Gear:
- Ligeiro
- Attack: 90〜95
-

Farmer Gear:
- Purring Cat Dancer
- Attack: 71〜76
-

Fighter Gear:
- Cat Paws
- Attack: 65〜67
-

Caster Gear:
- Calidus
- Attack: 100〜105
-

Ring:
- Despairing
- Defense: 117〜120
-

Earring:
- Volcano Earring
- Defense: 59〜60


