Each layer contains a special object that reflects the
atmosphere of that floor. Attack this object to earn lots of
runes. In this layer, keep an eye out for sparkling figures
made of snow.
Third Layer Strategy Guide
The Frozen World awaiting you in the third layer of the Abyss
evokes an image of the old kingdom buried beneath a blanket of
snow. Here you'll encounter yet more floors, new mechanics,
and your first mid-boss. Many of these monsters use ice and
lightning elemental attacks. Equipping a Flamestone will serve
you well throughout this layer, while an Earthstone will give
your attacks some extra punch around Floor 5. This page covers
everything you need to know to conquer the third layer of the
Abyss, including what monsters and obstacles you'll face on
the floors below.
- Total Floors:
- 16
- Recommended Level:
- 24
- Signal Fires Floors:
- 1, 5, 9, 13
General Mechanics
Runaway Snowballs
Cross a giant snowball's line of sight and it will tumble
toward you, growing in size as it rolls up more snow.
Running into one will send you flying, and you'll take heavy
damage in the process. However, snowballs can also damage
monsters, so try leading them toward packs of enemies. A
snowball won't start rolling unless you walk in front of it
or attack it, so you can stay out of its path if you're fast
on your feet. Keep away from a snowball to avoid activating
it, or set it off and then run in the direction you want it
to go.
Warp Moles
These moles dig tunnels that help you move quickly from one
location on the same floor to another. You'll encounter two
types of moles here: one-way moles that disappear afterward,
and round-trip moles that stay in place. Keep in mind that
these moles can be skittish. If they come under attack or
see monsters nearby, they'll hide in their holes and refuse
to help you. They may also bring you to unexplored areas.
Check your map to see where you've been to avoid getting
lost.
Hidden Runes
Notable Monsters
 Thunderdames
These creatures specialize in spin attacks that utilize
their lightning-tipped tails. Their close-range attacks
don't knock back opponents, which lets them deliver a
devastating amount of damage in the blink of an eye. Even
worse, their lightning attacks have a chance of paralyzing
their prey, leaving them temporarily powerless. They're weak
against blunt damage and earth elemental attacks, so equip
the Warrior or Fighter with an Earthstone for maximum
effectiveness. Skills that let you attack while still
keeping your distance are also a safe bet.
 Frostbearns
These ferocious monsters boast both high HP and attack
power, so taking them down can be time-consuming. Keep clear
of their wide, powerful attacks to avoid getting stunned.
Their attacks have a slow wind-up, so you can dodge them
somewhat easily and put some distance between you. Utilize
all your attacks and skills to take them down as soon as
possible. Since they're weak against both piercing and fire
damage, equip the Farmer or Archer with a Flamestone to deal
with these threats.
 Hoarnet Trees & Rumble Trees
As their names suggest, Hoarnet Trees summon large swarms of
Hoarnets, while Rumble Trees release legions of Rumble
Bumbles. Hoarnets strike with long-ranged ice-type
projectiles, while Rumble Bumbles use short-ranged
paralyzing attacks. Since these monsters will continue to
spawn as long as their tree is still standing, taking out
Hoarnet Trees and Rumble Trees should be your highest
priority. A swarm of Rumble Bumbles is especially annoying,
as their paralyzing attacks can leave you completely
helpless. Thankfully, these bees have very little HP, so use
a wide range of attacks and skills to pick them off as
quickly as possible. Both Hoarnet Trees and Hoarnets are
weak against slashing and fire damage attacks, while Rumble
Trees and Rumble Bumbles will fall to slashing and earth
damage attacks.
Notable Floors
Floor 8: Bees & Trees
On Floor 8, you'll face two monster swarms:
● 2 Thunderdames, 2 Bolt Wolves, 2 Hoarnets
● 2 Hoarnet Trees, 2 Rumble Trees
Be especially careful during the second swarm, since multiple trees will appear. The longer these trees stand, the more trouble you'll have controlling the swarm. Use powerful attacks and skills to swat the bees and their hives as soon as they spawn.
Floor 12: Pugil Panda (Mid-Boss)
This mid-boss employs a whole arsenal of attacks, including
a devastating series of punches, a whirlwind leg sweep, a
sturdy back thrust, and ranged magic projectiles. Like the
Frostbearn and other bear-type enemies, its size alone makes
it a fearsome opponent. It prefers to attack at close range,
so keep your distance to stay alive. Skills that can stun
enemies will also come in handy. Since it's weak to piercing
damage, the Farmer and Archer are both good choices.
Legendary Equipment
-

Wanderer Gear:
- Crystal Sword
- Attack: 60〜65
-
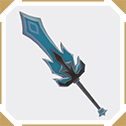
Warrior Gear:
- Crystal Greatsword
- Attack: 65〜70
-
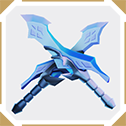
Rogue Gear:
- Shadow Walkers
- Attack: 55〜60
-
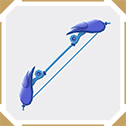
Archer Gear:
- Floco
- Attack: 48〜50
-
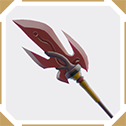
Farmer Gear:
- Luminous Prism
- Attack: 38〜40
-

Fighter Gear:
- Lonely Hearts
- Attack: 33〜35
-
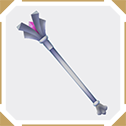
Caster Gear:
- Frigidus
- Attack: 50〜55
-

Ring:
- Gossip Ring
- Defense: 86〜91
-
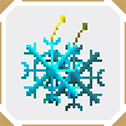
Earrings:
- Snowy Earrings
- Defense: 44〜45


